Installing mXrap for Client PCs
Hardware requirements
The minimum recommended requirements are:
- Graphics card that supports OpenGL 4.0 or higher, with updated graphics drivers.
- Note 1: We do not recommend Intel graphics cards as we have observed rendering and performance problems in the past.
- Note 2: We have experienced problems with computers with “switchable graphics”, but this seems to be functioning correctly after updating graphics drivers.
- Windows 7 or 10, 64-bit operating system
- 8 GB of RAM (for sites with small data requirements)
- 16 GB of RAM (for sites with larger amounts of data)
Support requirements
We are asking (within reason) that IT allow us to connect to engineer’s computers via Teamviewer for support purposes. Remote access is only needed ‘on demand’, which means we have no access unless the engineer explicitly gives us access. You can use the ‘Quick Support’ version, which only allows connections while it is running and the engineer is there. This software is not installed on the machine (get it here). All but one of the consortium member companies allow Teamviewer OR some alternative, i.e. through VPN.
Please note that RDP is not an alternative as the engineer is not able to see the screen. It is therefore not useful for training and does not facilitate troubleshooting where the engineer’s input is required.
Client PC setup
All PCs that run mXrap need the following:
- Updated graphics drivers.
- Security (USB-key) dongle drivers installed
- Access to the “root folder”, where the mXrap data is stored. This is usually either:
- On a local disk drive (for single-user sites).
- On a corporate network folder (for single and multi-user sites).
- On a shared folder on another engineer’s computer (for multi-user sites).
- On a shared folder on the ESG server (where the ESG server cannot access the corporate network).
- Access to the data sources to enable data updating:
- IMS seismic data:
Read access to the IMS network drive, where .msrap_evp files are shared,
IMS will set up a scheduled export to a read only shared folder. - ESG seismic data:
ESG data is exported directly to the “root folder”, so both the engineer and the ESG server will require access to the “root folder” location.
- IMS seismic data:
- The user should have read/write privileges to the PC. This is needed to save data from the software to the hard drive.
Licence server (Codemeter in network-mode only)
Depending on the agreement with the mXrap consortium, a network licence may be set up. The licence server will broadcast messages to all other computers on the same subnet. If some computers are on a different subnet (or connected via VPN), each client computer can be configured to seek out the licence at a particular IP/hostname.
Licence client setup
- Ensure the licence server is setup, see the ‘Licence server’ section on this other page for details: IT personnel’s guide to installing and managing mXrap
- Install the dongle drivers (see below).
- For the Silver Codemeter or Software-based dongle:
- If it is used as a ‘network key’ then it should just work when the computer is connected directly to the office network.
- If the computer is used off-site and needs to connect to the office network key (via VPN), then:
- Open the ‘Codemeter Control’ program and press the ‘WebAdmin’ button
- In the displayed webpage, browse to:
Configuration –> Basic –> Server Search List - Click ‘Add’ and enter the IP or hostname
- Hit ‘Apply’
Download required software
The first step is to download and install mXrap, mXsync, and the dongle runtime. Please request the downloads username and password from the support team.
You can get the latest mXrap from:
https://downloads.mxrap.com/mXrap/
If you have a silver Codemeter dongle, download the Codemeter version.
If you have a greenish Wibu dongle, download the Wibu version.
Next download the dongle runtime from:
https://downloads.mxrap.com/Dongles/
If you have a silver Codemeter or a Software-based dongle then download ‘CodeMeterRuntime.exe’.
If you have a greenish Wibu dongle then download ‘WibuRuntime.exe’.
This runtime needs to be installed on each computer that will use the mXrap software.
Licence update
Next, let’s make sure that your dongle license is up to date. Usually mXrap will update your license automatically, but you need a valid license to start mXrap in the first place. So for the first time, make sure the dongle is plugged in and then run the ‘About mXrap’ program (it is installed alongside mXrap, so it should show up if you search for it in the start menu). On the right hand side of the window you should see a “Licence Auto-Update” area. It will connect to our server and download any licence updates that are available for your dongle. It will also display the expiry date of the licence, so you should be able to confirm that the licence is valid. When that is finished, you should be able to close ‘About mXrap’ and run mXrap itself.
Installing mXsync and downloading a root folder
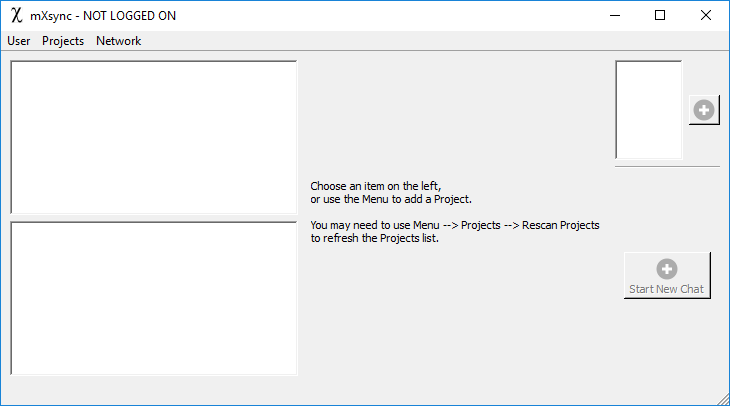
Next we’re going to setup mXsync and use it to download an example ‘root folder’ that you can use to test out mXrap. Open the mXsync program. If this is the first time that you have run mXsync on this machine, it will look empty and say ‘NOT LOGGED ON’ in the title bar:
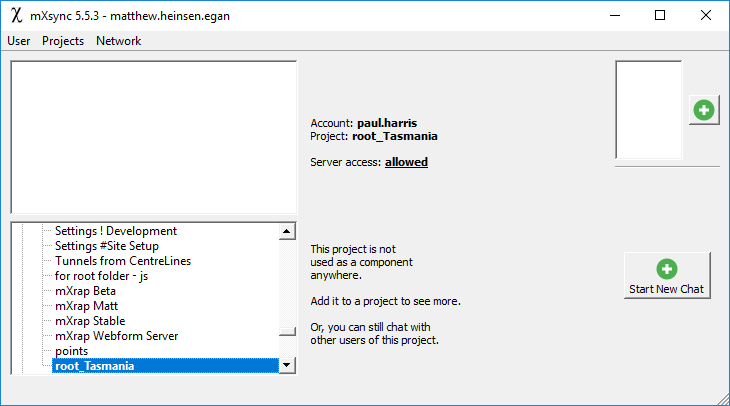
To login, go to ‘User -> Login’. Use the username and password provided. It should give you a nice welcome message. Now you’ll be able to see a list of users and their projects in the bottom-left. The one that we’re interested in is paul.harris / root_Tasmania:
The method to download other projects is to make our own project, and then add other projects as components. Go to ‘Projects -> Add Project to List’. Make a new empty folder for our new project (somewhere with a good amount of free space available). I will use “D:/mXsync_follows” as an example. mXsync will ask if you would like to create a blank configuration file:

Yes, you would like that.
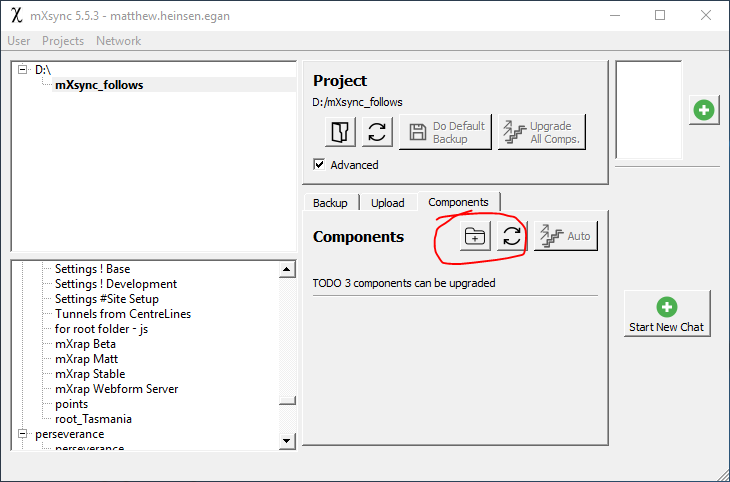
Now you should see the new project folder in the top-left panel (this is a list of all projects known to mXsync on this machine):

Tick the ‘Advanced’ checkbox to open up some more options, and then go to the ‘Components’ tab. Click on the folder with a plus to add a new component to this project:
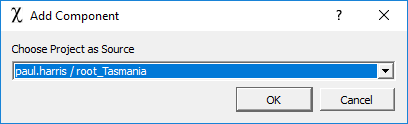
Select the ‘paul.harris / root_Tasmania’ project as the source:
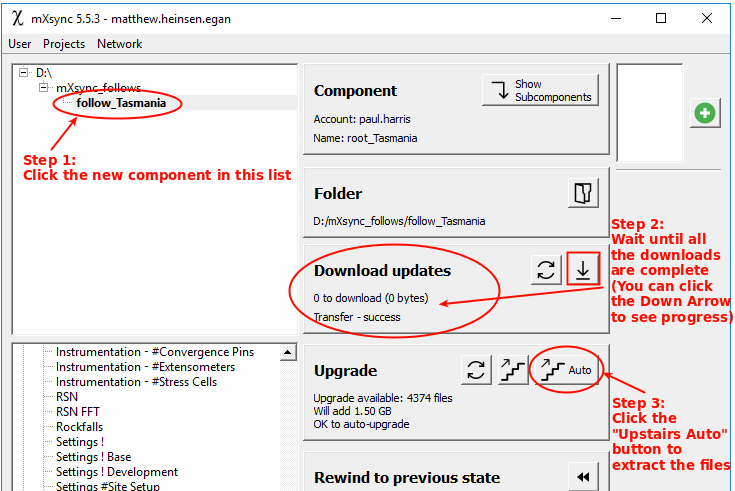
When prompted, make a new empty subfolder to hold the component. I’ll use D:/mXsync_follows/follow_Tasmania. You should see the new component folder appear in the top-left panel of the mXsync window. When you click on the folder name “follow_Tasmania”, you will see information about the component, in the middle panel.
It might take a while to download the updates (you will see some indication of the progress in the ‘Download updates’ panel). When they updates are ready, you will be able to apply them to your local copy by clicking the Upstairs Auto button in the ‘Upgrade’ panel. In the future, when the source project gets updated, you can return here to upgrade your local copy.
When the patch is complete, try opening the Tasmania root folder in mXrap. Open mXrap and click the ‘Switch’ button next to ‘Config Root’:
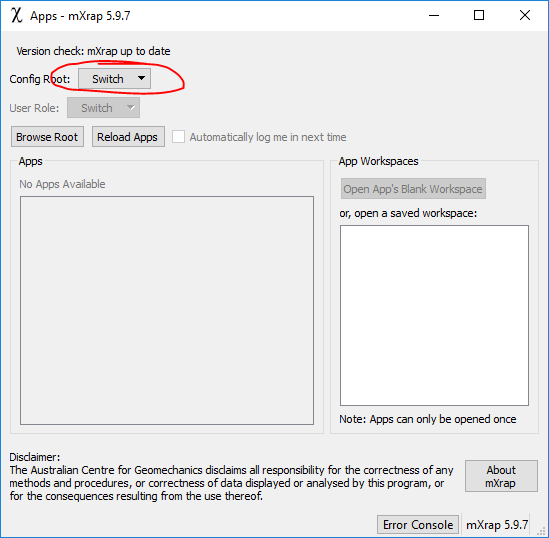
At this point mXrap will show you a list of all of the root folders that it remembers. Because this is the first run, that list is probably empty. Click on ‘Add a Root’, and then select the root folder (in my case D:/mXsync_follows/follow_Tasmania).
You might see a message about committing to an upgrade:

This indicates that your version of mXrap is newer than the version most recently used with this root folder. In this case, we’re happy to open the root folder with this new version, and we’re going to keep using the new version with this root folder, so click ‘Yes, commit to upgrade’.
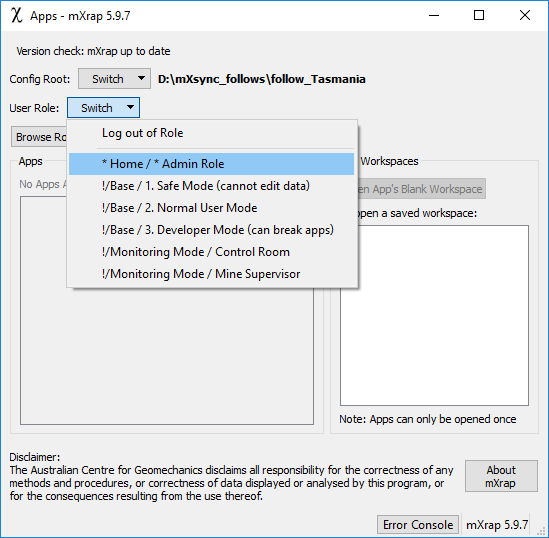
Click the ‘Switch’ button next to ‘User Role’ and select ‘Admin Role’:
Now you should see all of the apps available to you in this root folder:
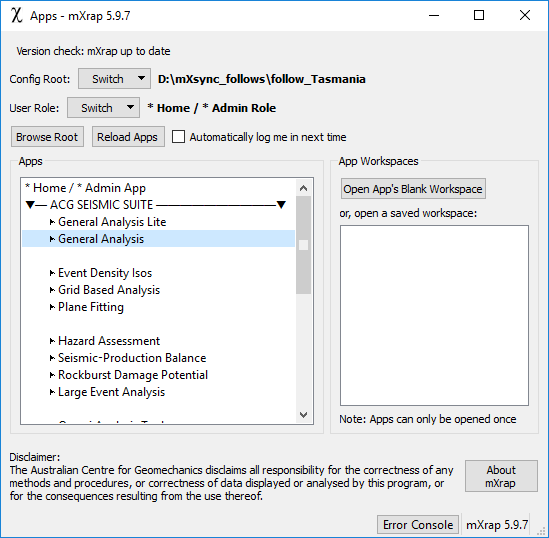
You can double-click on an app name to open up a new blank workspace for that app.
Further information about using mXrap, mXsync, and specific apps is available through the training videos:
https://mxrap.com/mxvideos/
If you’re asked to login for the training videos, use the same username and password used for the downloads section.
If you have any questions, send us an email at support@mxrap.com
Data server
There are no services for data. All data is stored in one folder on any network drive. The location on the network drive is generally determined by the engineers.
Post installation setup
Once the drivers and mXrap are done, we can assist further with remote access through Teamviewer. These last post-installation configurations are limited to gathering and restructuring data, and a quick audit of the system.